Friday 21 March 2014

Orange Peel Cushion Tutorial


Well, today is a very exciting day, as I'm guest blogger over at Simply Solids. I've never been a guest blogger before!!
Justine from Simply Solids sent me a lovely selection of fabrics and I came up with this cushion idea.
It's very easy to make. The orange peel shape leaves are machine appliquéd onto the cushion front, so no curved piecing involved! and it has an envelope back so no zips either!

Do pop over to Simply Solids blog to see the full post. 
You can also download the PDF with full instructions, orange peel template and photo tutorial here
It's a perfect size for using outdoors now the spring-like weather has arrived (along with a good book and a cup of tea, of course!) and as Justine so rightly says - it would make a great Mother's day gift.


Pin It

Thursday 20 March 2014

A Little Paper Piecing


Much as I have really wanted to start some dressmaking with the fabrics I bought and showed you last week, I've been really good and finished off some other projects first.
I have been making paper-pieced birds.


It had seemed such a nice idea at the time, but I had forgotten how long paper piecing takes to do.
Both these birds are from patterns I bought on Craftsy. The songbird in the top photo and the one below, is from the very talented Kristy who blogs at Quiet Play You can find the patterns here and here


I made each pattern twice, one facing each way, and I'm really rather pleased with them! I did question my sanity when I embarked upon that tiny section with the beak in it, but it was actually a lot easier than I imagined. 
I have a bit of a love-hate relationship with paper piecing. I love the precision of it all, and I love the process. You know it's going to work so you just sit back and enjoy it, but patterns as detailed as these can mean there is a lot of bulk at the back of some of the seams, and the back of the work just looks so untidy! And it always takes so much longer than regular piecing,…... which I always forget when I start it! I do think they were worth the time though, don't you? 


Once I'd finished them I embroidered a little eye on each bird.


Project done!


Pin It

Saturday 15 March 2014

Springing into Action

Yes, all that gorgeous cherry blossom is in my garden. It's been in flower for the last week - Spring has definitely arrived!
Suddenly, there is so much to do.
I've swapped these

for these

I've been sowing (not sewing!)……..lots of seeds


Sweet peas are a must have flower in my garden each year, soI've been soaking seeds I saved from last years's flowers

and planting them in tall "pots" made from newspaper.


I've been buying potatoes tubers 

and moving the salad leaves that were in the greenhouse all winter to an outside spot.


It's so nice to see the garden swathed in sunshine.
I haven't completely forgotten my sewing though. I've made the quarter square triangles for my quilt.


And guess what! I bought an adjustable dressmaking model !


Sorry about the photo bombing by the cat…..she's yet to learn that life doesn't always revolve around her!
I have wanted one of these for so long, and as making more of my own clothes was one of my New Year resolutions, I decided now was the time to take the plunge. It was quite a long process adjusting it to my measurements, and it still doesn't accurately emulate my really short waist, but I'm hoping it will be a lot of help in getting an accurate fit.
Of course, once I had the model, I needed to buy some fabric to make some clothes with. I took a trip to Leamington Spa as there was supposed to be a very good fabric store there.Well, all I can say is, I was very disappointed. I stopped and bought some lunch and googled fabric shops on my phone. There were 2 more fabric shops in Leamington, so I went off exploring, and I'm so glad I did, as I found this little gem.


and I was thrilled. It has lots of nicely labelled fabric on easily accessible shelves. It has patterns to browse, all the needles, zips etc you could want, and the most friendly and knowledgeable staff I have ever come across. I will be going back!!

I bought some cotton jersey for T shirts and  tops


and some dress fabric.


I'm so thrilled with that top one. I didn't see it until the last minute when I was actually at the counter about to pay. It just happened to have a pink in it that I knew instantly would be a perfect match for a jacket I have.
As soon as I got home I draped it on my dress from, with the jacket on top.


See how good that match is?


I have a wedding to go to in May, and if I can just make a dress, that fits…., that I like……… then that wedding will be sorted!
It's a good job I got all those seeds sOwn, because I think it's back to the sEwing  now!


Sunday 2 March 2014

Block Buster Sunday #5 The X Block


The block I've been playing with today is nice and easy, and I've even allowed for trimming the quarter square units in my fabric measurements, so you don't even have to be that accurate whilst making them….. perfect for a quiet Sunday.
And yes, I've chosen some VERY pink fabric. Well, to be honest, it's not only quiet round here, it's also wet and very grey, so I had to bring some brightness into the day somehow!!
I've made a 12" block, as I have plans for this little baby, but as usual I've provided cutting instructions for other sizes too. Note that the cutting instructions are for TWO blocks, so you don't have any wastage

For two 6" finished blocks you need:
6     3 1/2" squares of  fabric A
6     3 1/2" squares of  fabric B
8     2 1/2" squares of  fabric C

For two 9" finished blocks you need:
6     4 1/2" squares of  fabric A
6     4 1/2" squares of  fabric B
8     3 1/2" squares of  fabric C

For two 12" finished blocks you need:
6     5 1/2" squares of  fabric A
6     5 1/2" squares of  fabric B
8     4 1/2" squares of  fabric C
    

Pair each colour A square with a colour B square.Place one on top of the other, right sides together and draw a diagonal line from one corner o the opposite corner. Sew a seam 1/4" away from the drawn line on either side.

Rotary cut along the pencil line to create 2 half square triangle units.


Press open with the seam allowance pressed to the dark side.


Place the 2 half square triangle units right sides together so that the dark right side of one is facing the light right side of the other. Draw a diagonal pencil line as you did before.
Sew 1/4" away from the line on either side.


Cut along the pencil line.


Press each unit open.


Trim each unit to the same size as the colour C squares. For accurate trimming make sure that the diagonal like on your ruler is aligned with the diagonal seam on your unit.


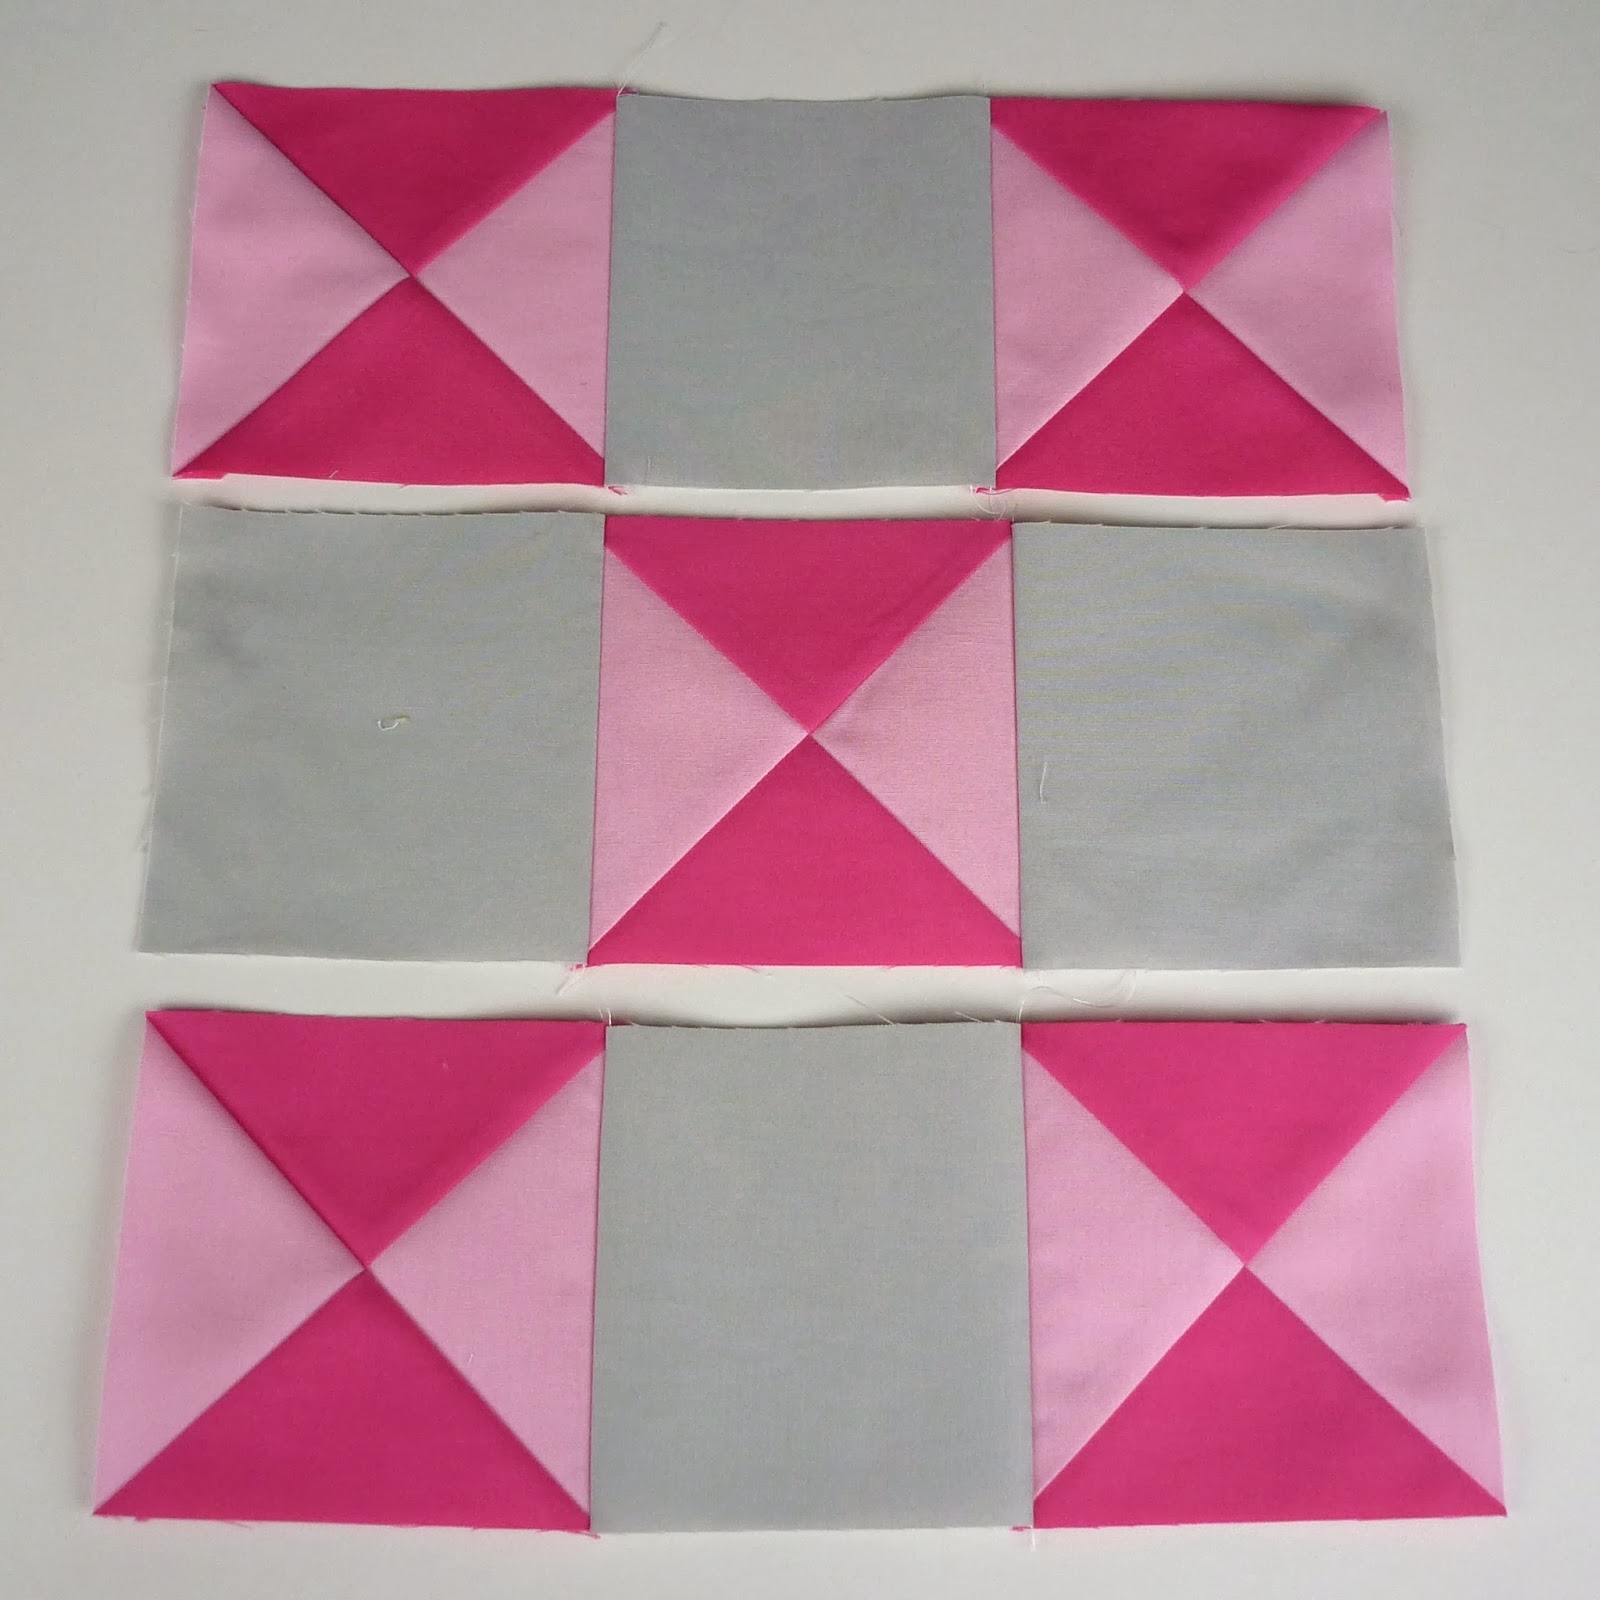
Lay out the sections of your block as shown.


Sew the pieces in each row together.


Press seams towards Fabric C


Sew the rows together to complete the block.


I hope you liked my choice of block for today.
I'm going to make a baby quilt using this block and I deliberately chose solids as I want to practice some free motion quilting on this design.
What fabric would you choose to make this block?

Pin It

LinkWithin

Related Posts Plugin for WordPress, Blogger...